Alright, all you wonderful cookie loving people out there, as you know the first step in all of this craziness is to BAKE THE COOKIES!!! YAY!!! We’re not talking Pillsbury out of the tube kinda stuff, we want to make our grandmas proud and tackle cookies “from scratch”. NOW, as with most aspects of cookie-erie, everyone has their own different favorite recipes and techniques that work for them. This is my own personal tried and true recipe complete with Erin style crazypants type A tips that I’ve learned and incorporated into my process in the past few years.
SUGAR COOKIES!
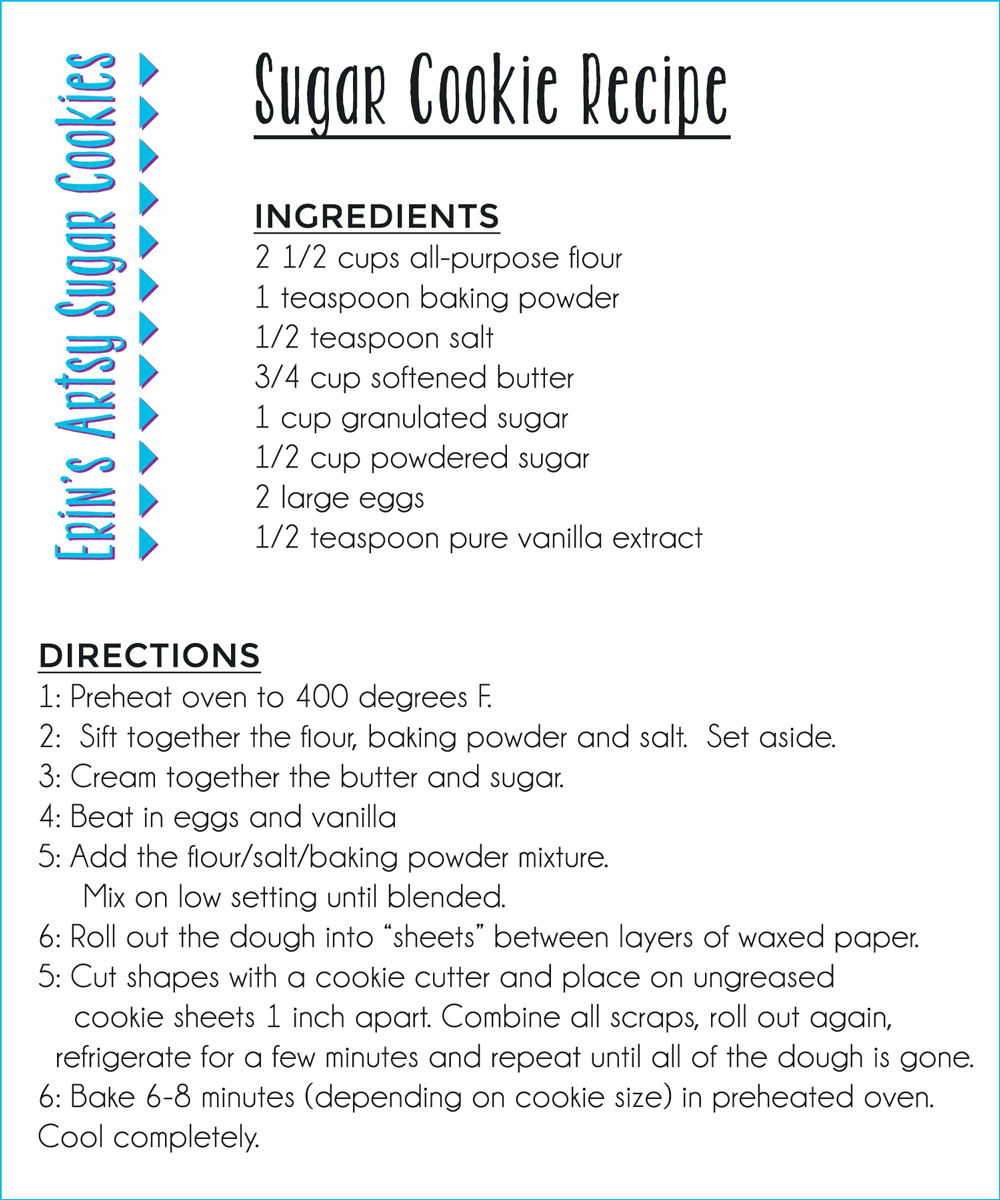
2 1/2 cups all-purpose flour
1 teaspoon baking powder
1/2 teaspoon salt
3/4 cup butter, at room temperature (it’s supposed to be “unsalted” but I always used salted. Sue me.)
1 cup granulated sugar
1/2 cup powdered sugar
2 large eggs
1/2 teaspoon pure vanilla extract
Directions
1: Preheat oven to 400 degrees F. (I use an oven thermometer to be sure the temperature is accurate. My dial is always a weeeeee bit off.)
2: Sift together the flour, baking powder and salt. Set aside.
CRAZYPANTS ERIN TIP: I like to mix these dry ingredients ahead of time, sometimes I do an entire bag of flour at a time while I’m at it, then I wrap them in plastic wrap and a gallon Ziploc bag to keep in the cabinet. This saves me time on future batches!
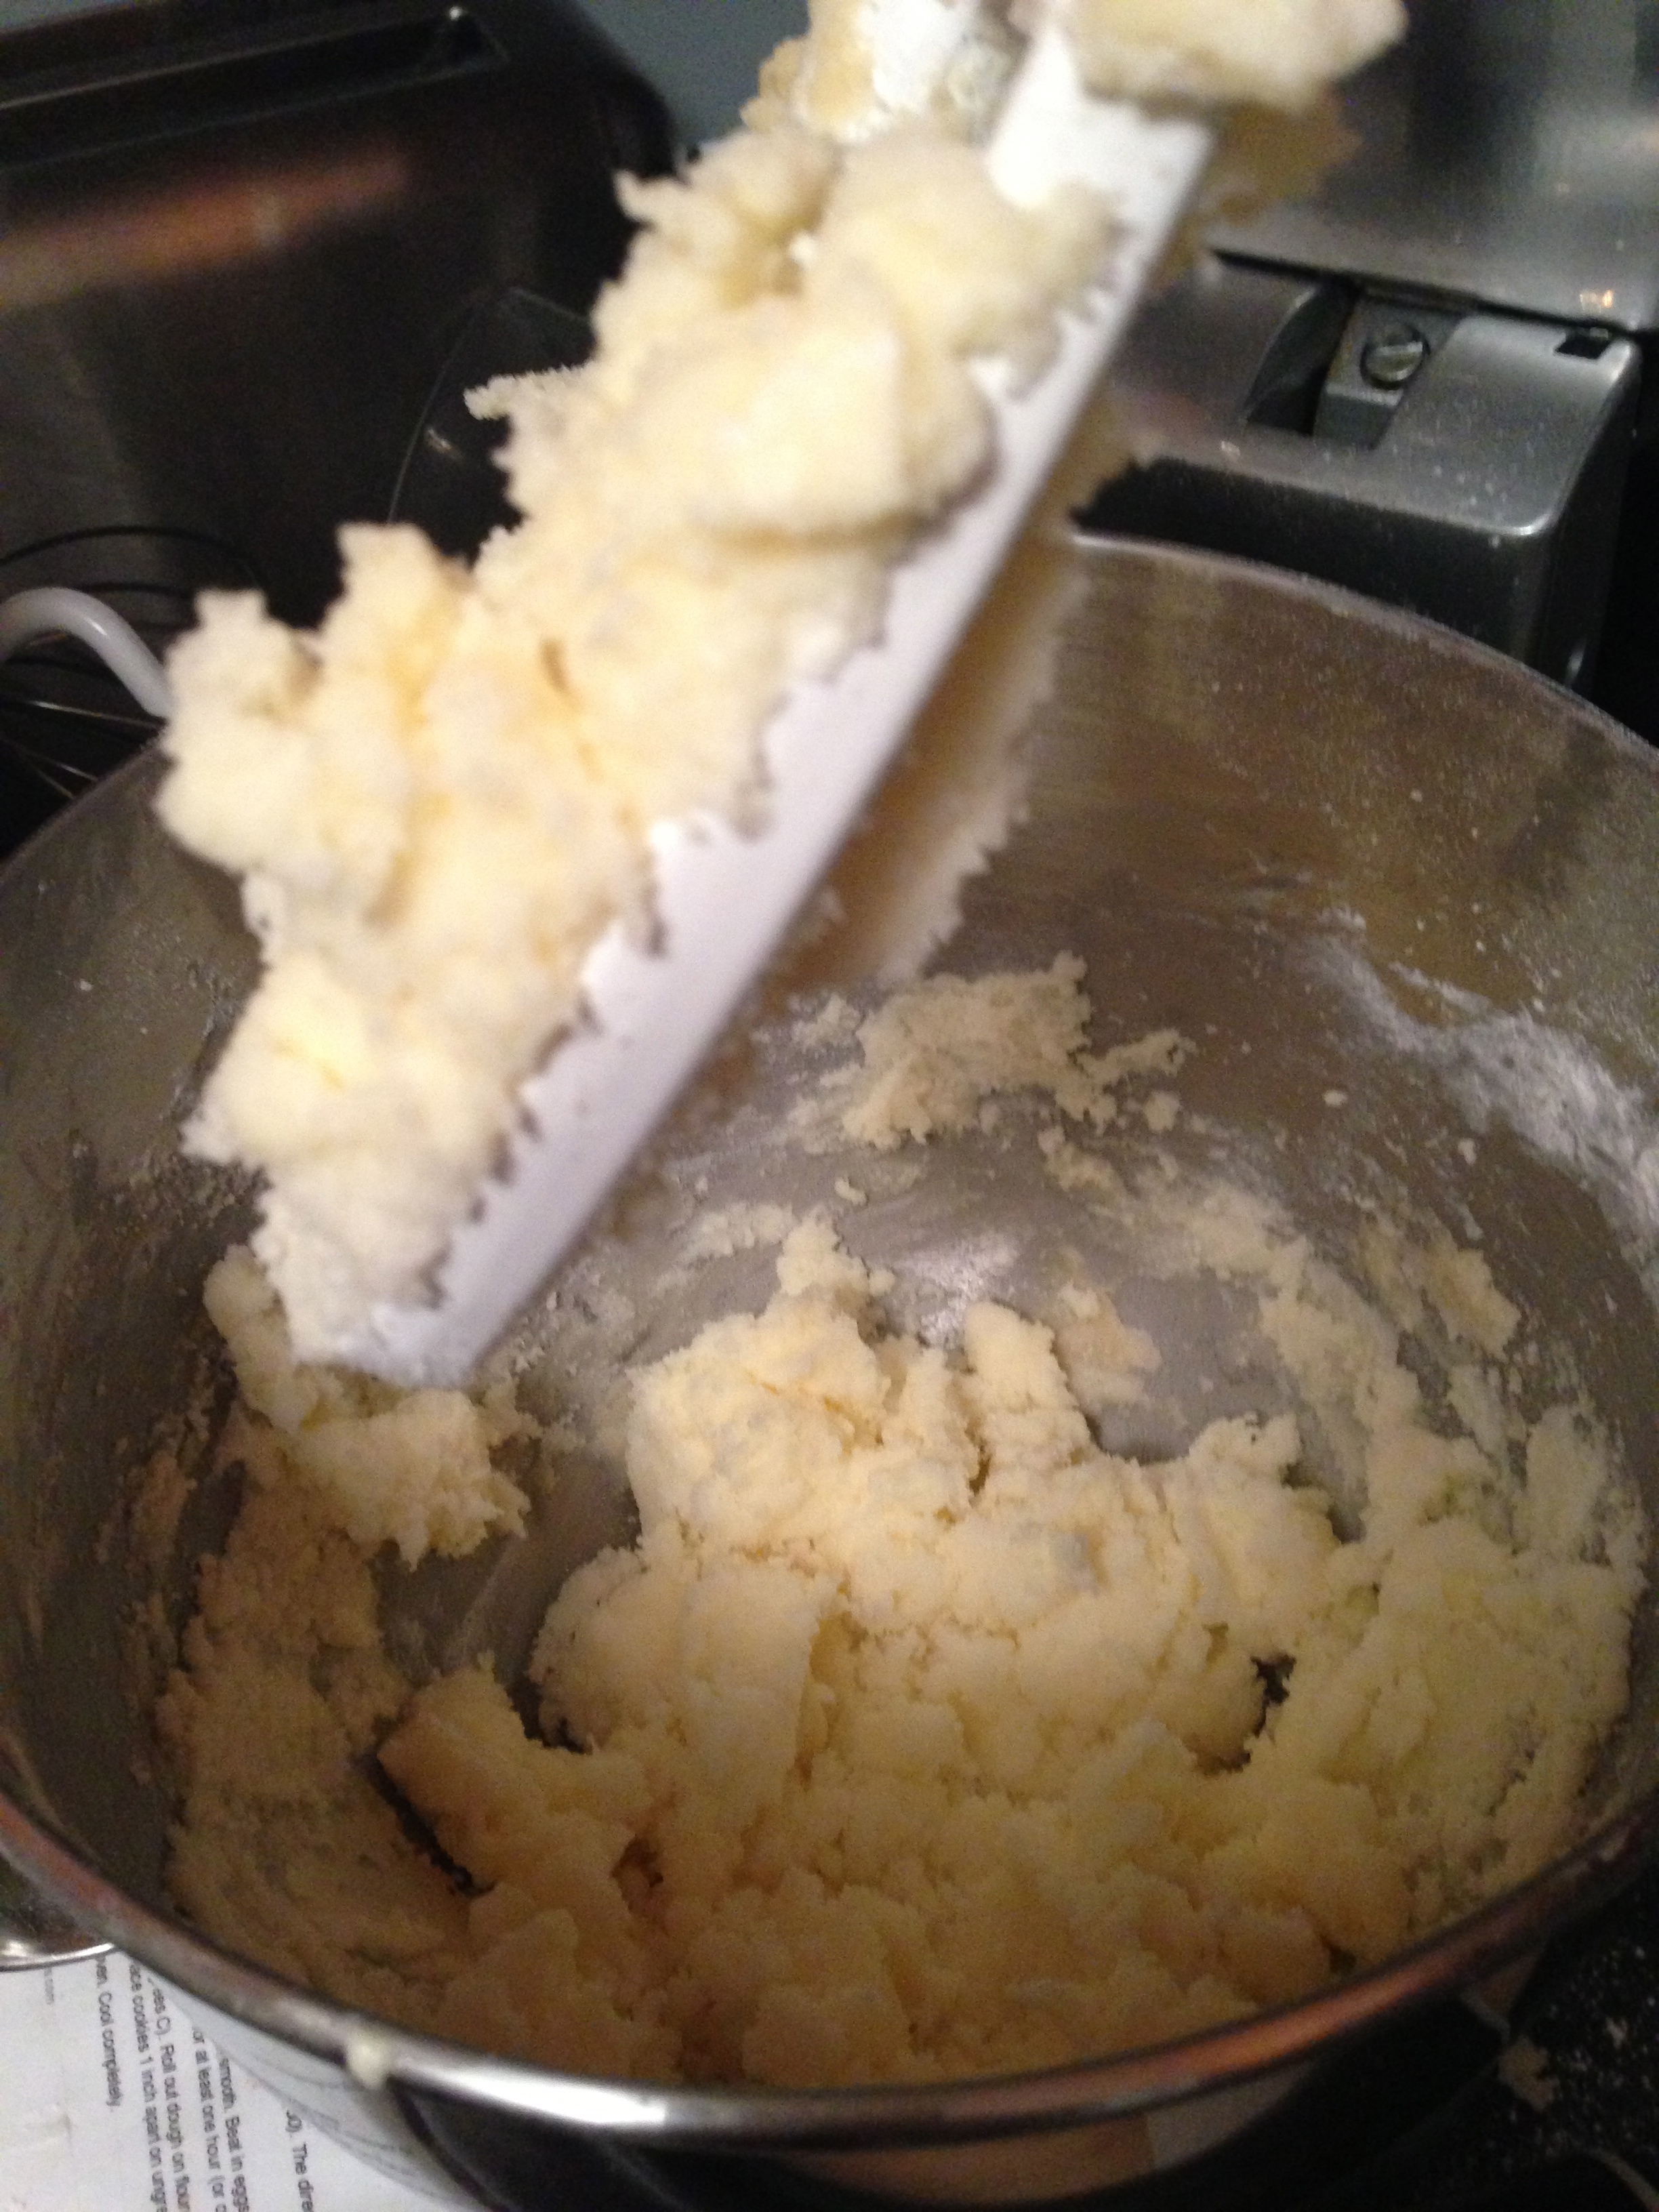
3: Cream together the butter and sugar. (Leave the butter out until it’s room temperature, DON’T MELT IT IN THE MICROWAVE! I’m all for shortcuts, but this one won’t do you any good.) Don’t over cream, just until sufficiently mixed. I usually add the sugar a 1/2 c. at a time. It should look something like this!
4: Beat in eggs and vanilla

5: Add the flour/salt/baking powder mixture. Mix on low setting until blended.

6: Roll out the dough into “sheets” between layers of waxed paper. (no need to flour the rolling pin or surface AND easier clean up! Score!!)

CRAZYPANTS ERIN TIP: To keep the dough the perfect uniform thickness I like to use strips of 1/4 inch wood on each side to rest the rolling pin on. I got these at Michael’s in the craft wood section and taped them together.
7: Put these “sheets” of cookie dough in the fridge overnight. The longer you chill it the easier it is to work with AND the less it spreads when baked. This is especially important when your cutter shape has a lot of defined edges and details that you want to maintain.
LAZY ERIN TIP: I’m not gonna lie, in a pinch I’ll throw the sheets in the freezer for an hour or two to speed up the process buuuuut the overnight model is far superior.
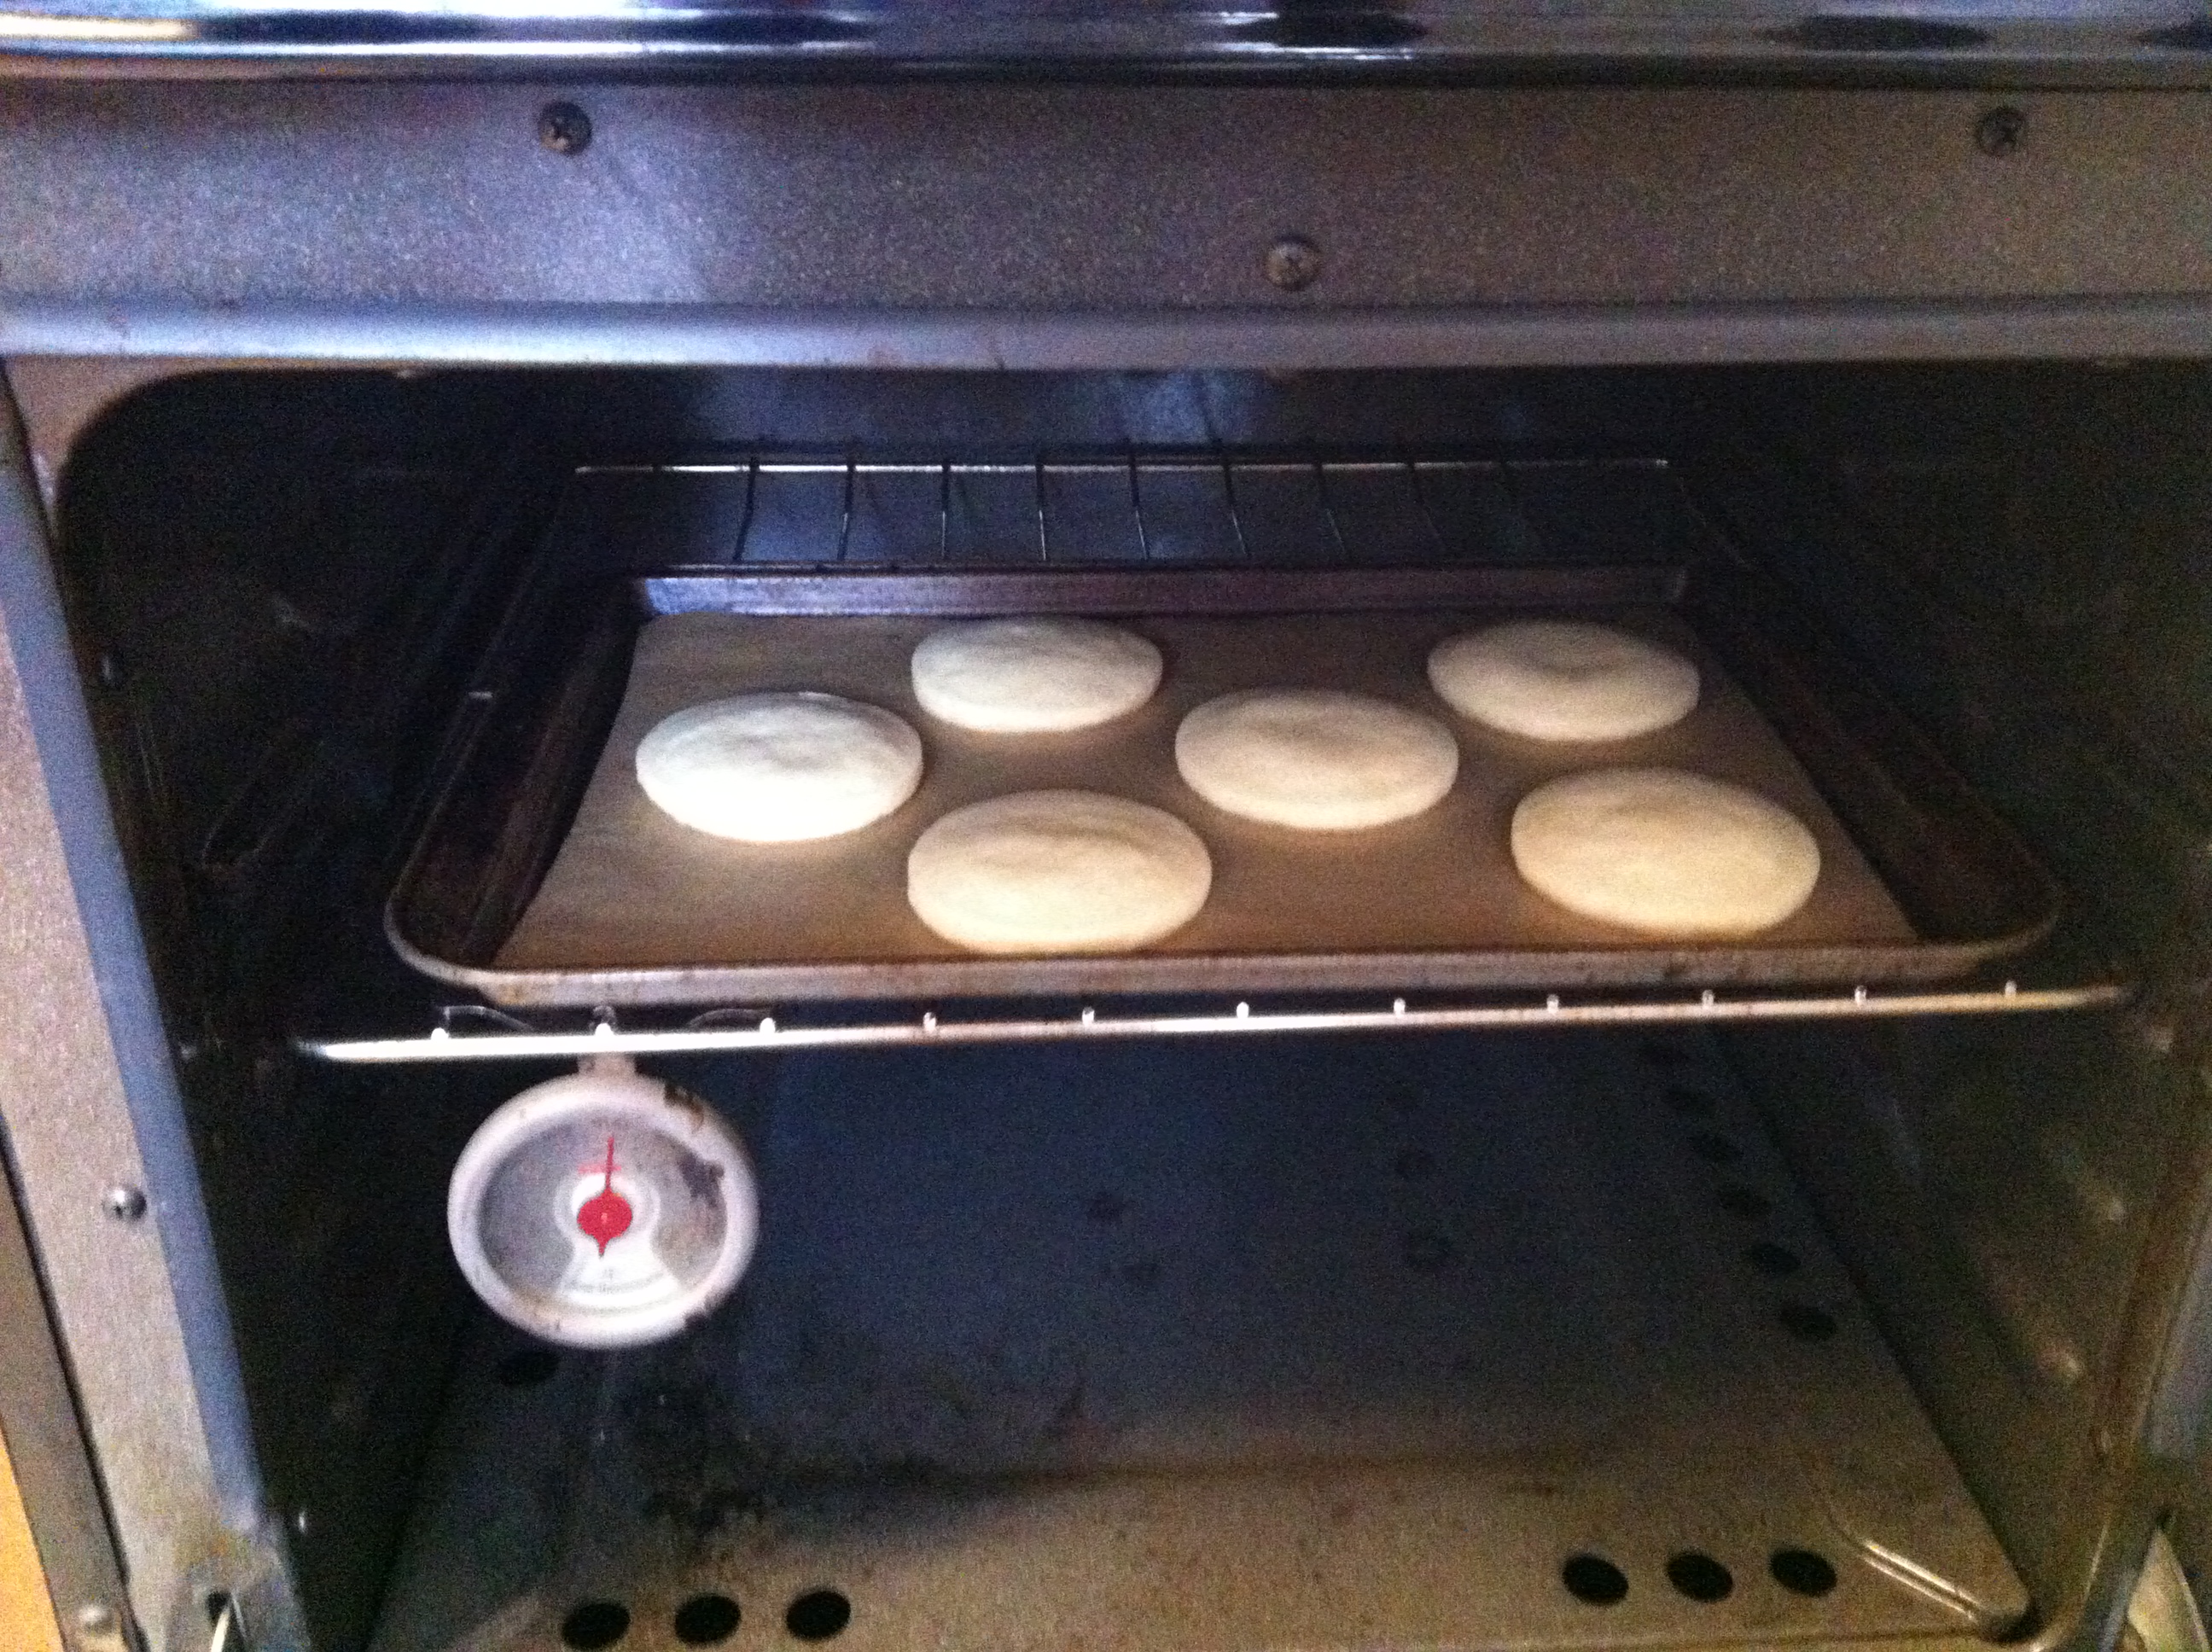
8: Cut shapes with a cookie cutter and place on ungreased cookie sheets 1 inch apart. I HIGHLY recommend using parchment paper!! Again, major clean up minimizing and you’re less likely to burn your sugary canvases. (I like to cut an entire roll of parchment to cookie-sheet size with an Xacto knife so I don’t have to worry about cutting them down to size in the middle of my baking process.) I tend to put the cookie sheet in the fridge for a few more minutes before putting it in the oven, they keep their shape better. Combine all scraps, roll out again, refrigerate for a few minutes and repeat until all of the dough is gone.

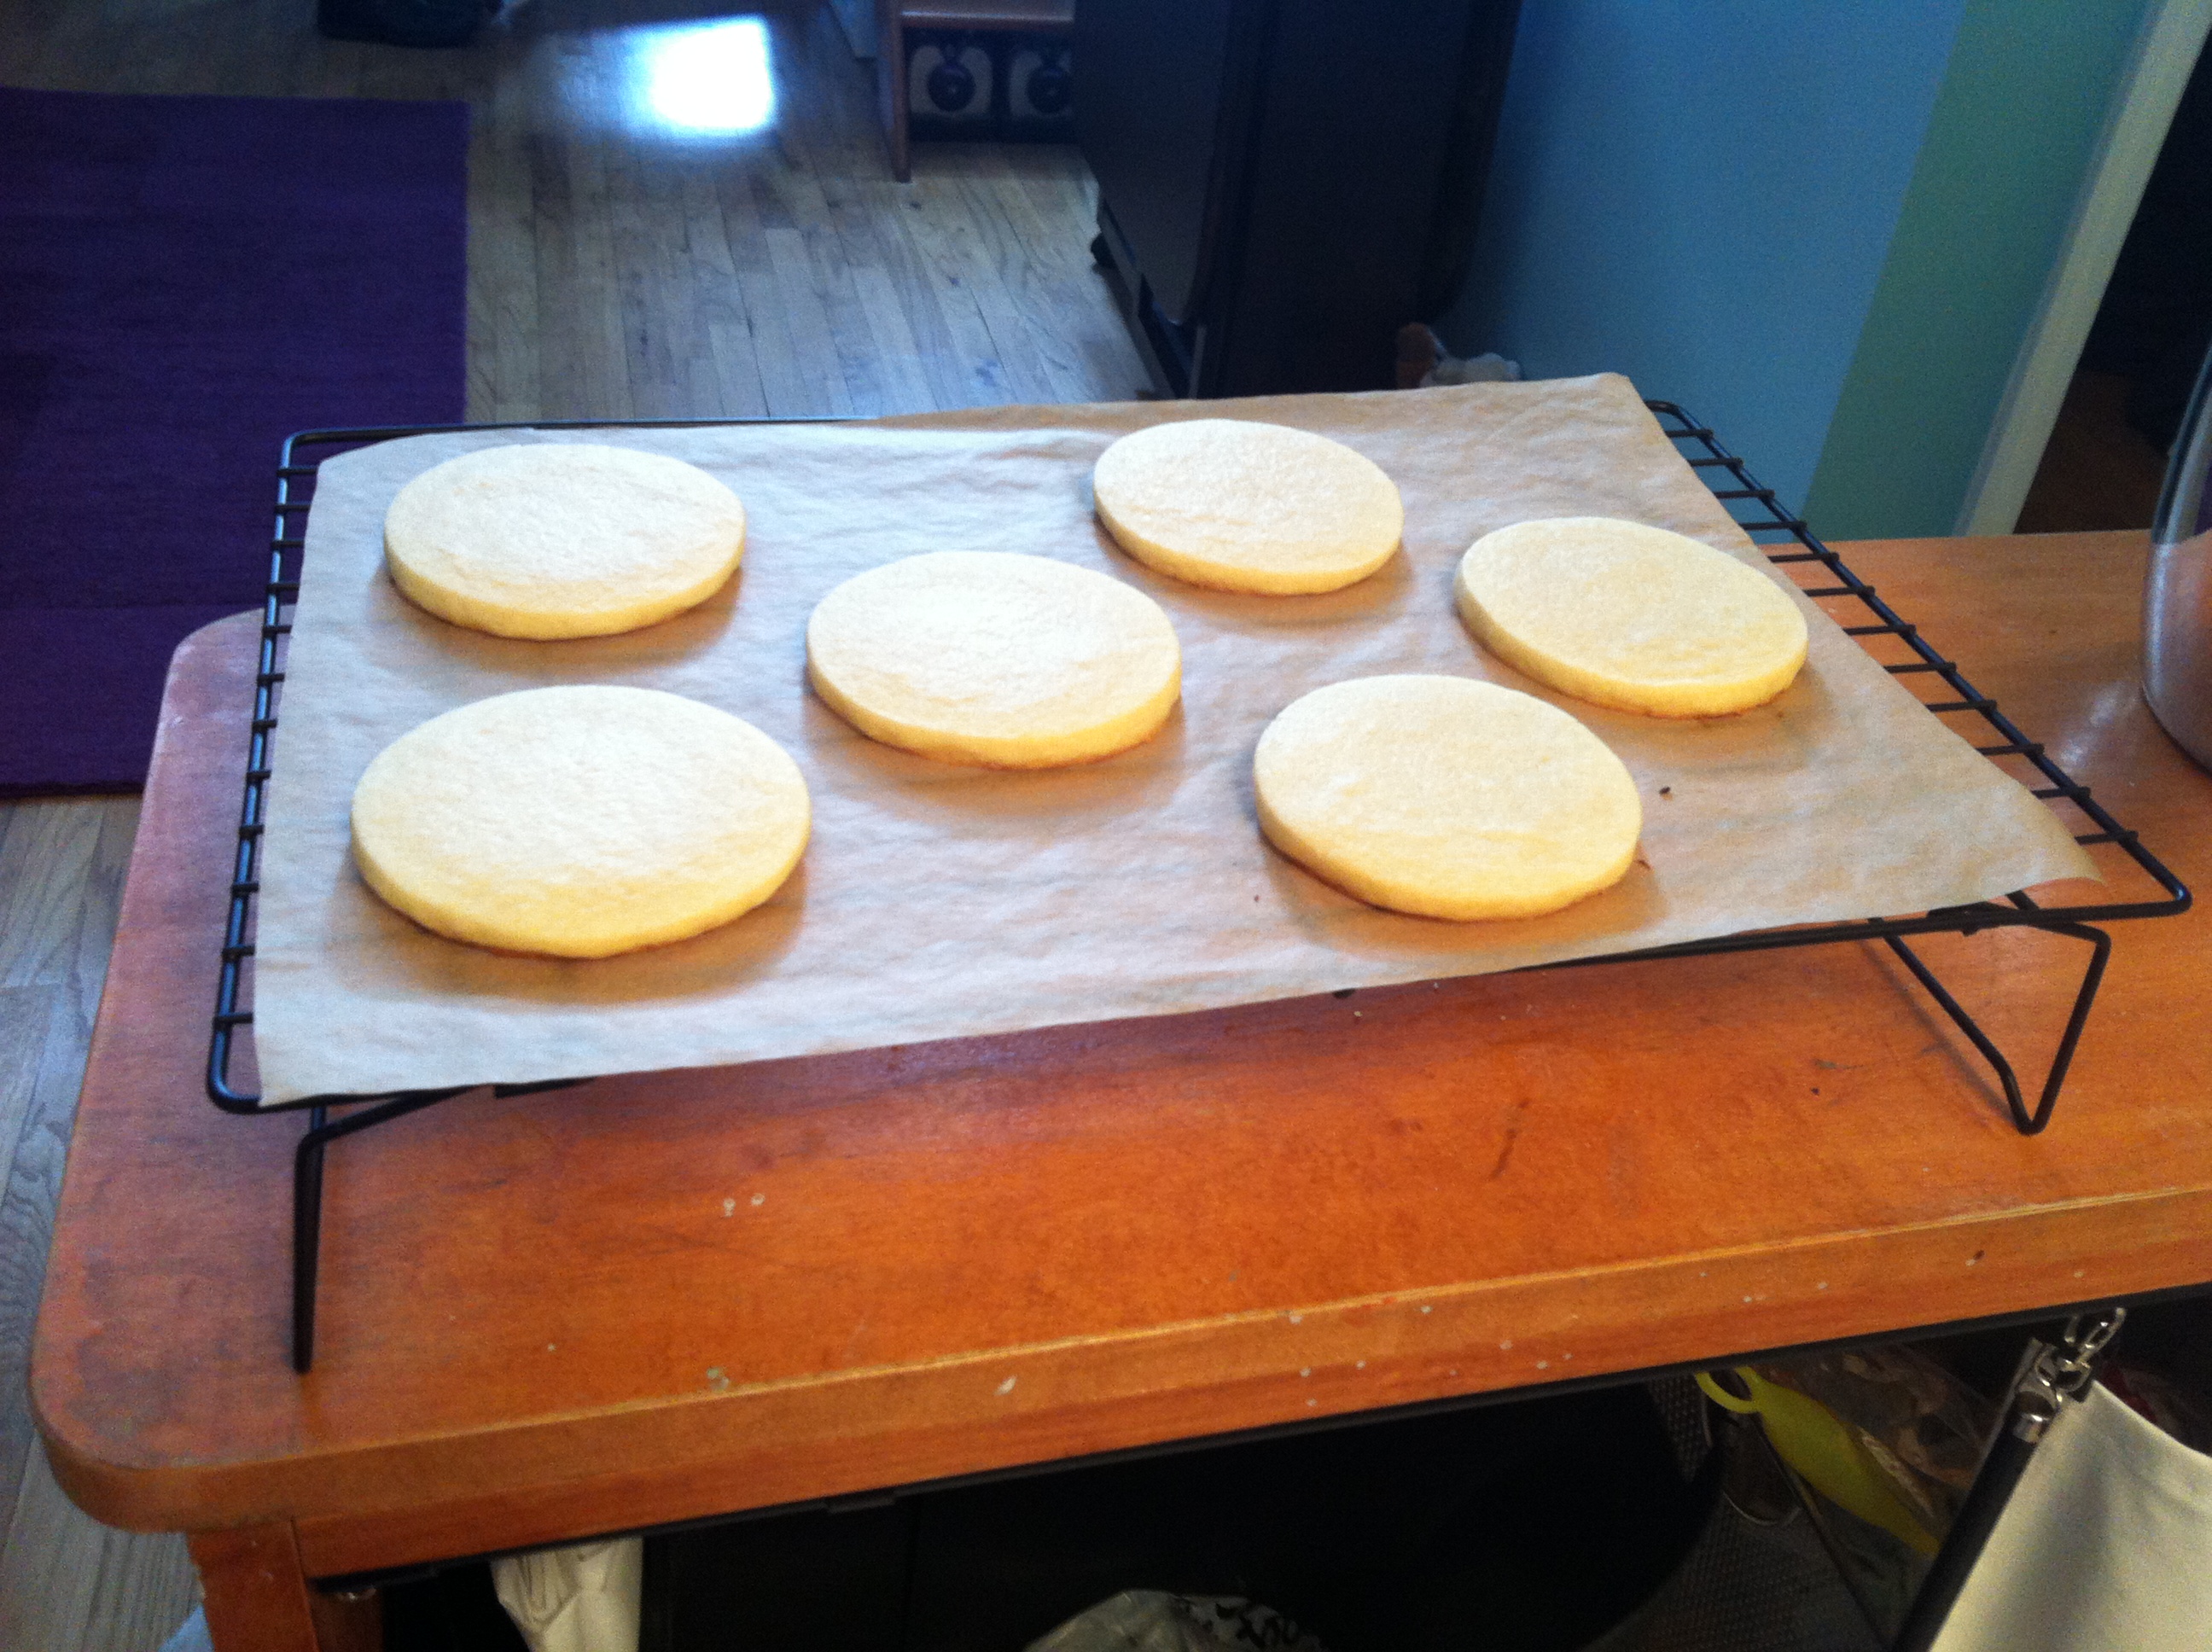
9: Bake 6-8 minutes (depending on cookie size) in preheated oven. Cool completely. (Did I mention my NYC oven is absurdly small? I hope you can fit a REAL size cookie sheet in your oven.)
That’s my personal process complete with all of the super helpful (though admittedly OCD) tips for efficiency, minimal clean-up/prep time aaaaaaaand the general pursuit of perfection. I realize that I’ve revealed my slightly insane side with all of the extra details, but hey, I warned you. I hope this post proved to be helpful to someone out there! I’ve attached a more printer-friendly and tip-free version below. (Click on it!) Until next time, peace, love, and cookies to all!
XO
E